


Table of Contents Show
Explore the world of innovation and creativity with these top 10 invention ideas for school projects. The activities range from building straw rockets to creating mini water cycle models, providing students with an enjoyable and educational way to explore science, engineering, and creativity. With easy-to-find materials and step-by-step instructions, students can unleash their imagination and hone essential skills while engaging in exciting experiments. Prepare to spark curiosity and motivate the next generation of inventors!
Car Powered by Balloon
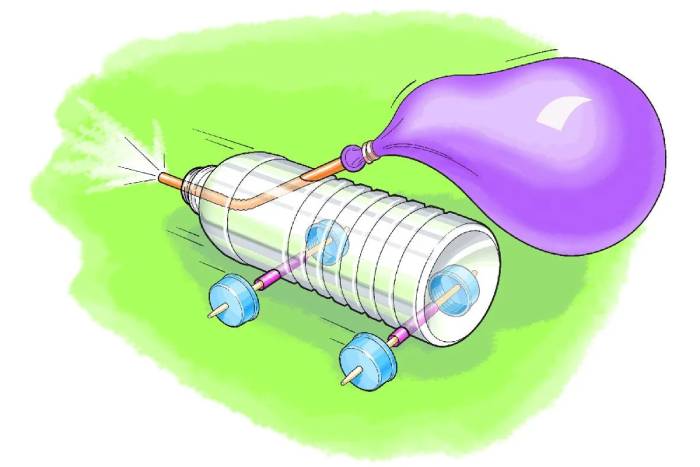
To make a balloon-powered car, you will need a few materials such as a plastic bottle, a screwdriver, a wooden stick, buttons, a rubber pipe, and duct tape. Follow the below steps to create your own car:
1. Cut out a car frame from cardboard, making sure the skewers extend from the sides to serve as wheel axles.
2. Cut two straws in half and attach them securely to the bottom of the cardboard frame as wheel axles.
3. Make holes in the tops of the plastic bottle using a nail.
4. Insert a skewer into each straw and attach the wheels to them.
5. Secure the mouth of a balloon to the narrow end of one of the straws using a rubber band.
6. Position the balloon on the cardboard vehicle by placing the straw down the middle.
7. Blow air through the open end of the straw to inflate the balloon.
8. Once inflated, place the vehicle on the ground and give it a push forward.
Fun Fact: The principle of using air pressure to propel vehicles is similar to how rockets function in space exploration!
With these simple steps, you can engage in a fun and educational experiment that demonstrates the concepts of air pressure and kinetic energy.
A Self-Watering Plant System
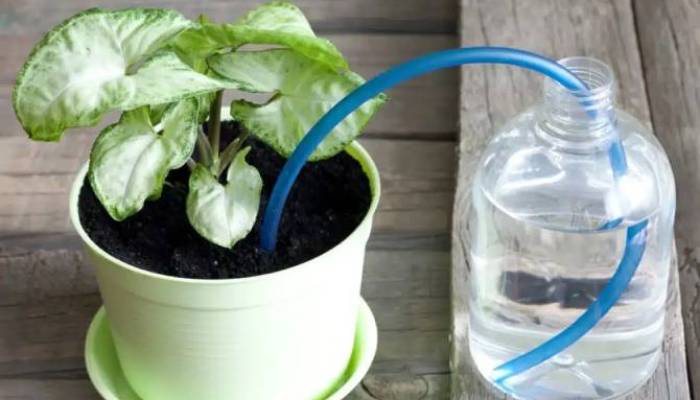
To set up a self-watering plant system, gather these items: a container for your plant and water, a wick or rope, and soil. Here’s how to do it:
1. Find a container and drill a small hole in the bottom for drainage.
2. Cut a piece of wick or rope long enough to reach from the bottom of the container to the soil’s surface.
3. Thread one end of the wick through the drainage hole and lay the other end on top of the soil.
4. Fill the bottom of the container with water, making sure the wick is soaked.
5. Add soil to the container and plant your chosen plant.
6. As the soil dries out, the wick will pull water up from the reservoir, keeping your plant watered without you having to do it manually.
Stethoscope
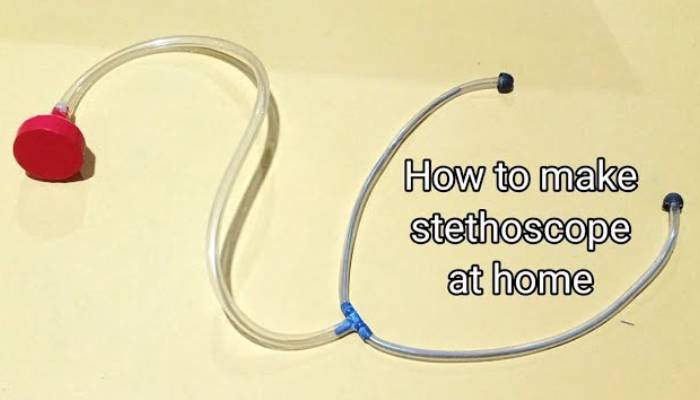
Here’s a simple guide to creating your own DIY stethoscope with just a few materials:
You’ll need:
– Funnel
– Pipe
– Y-tube
– Balloon
Follow these steps:
1. Attach one end of the pipe to a funnel, making sure it fits snugly. Then, insert the other end of the pipe into another funnel to create a tube.
2. Take a balloon and stretch it over the open end of one of the funnels. Secure it in place with tape.
3. Decorate your homemade stethoscope to make it personalized and fun!
Fun Fact: The stethoscope was first invented by French physician René Laennec in the early 19th century. Initially, it was a simple wooden tube used for listening to sounds within the body.
Smartphone Projector
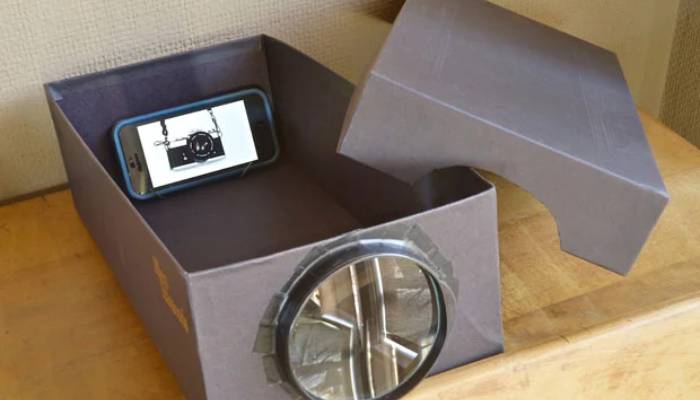
Here’s a step-by-step guide to creating your own smartphone projector, perfect for a school project or science fair:
You’ll need:
– Cardboard box (shoebox or any narrow rectangular box)
– Clear tape
– Hobby store magnifying glass or camera lens
– Scissors or hobby knife
– Smartphone
Instructions:
1. Begin by cutting out the flapping lid of the cardboard box so that the top side remains open, allowing you to slide your phone into the box easily.
2. On one end of the box, cut a circular hole slightly larger than the diameter of the lens you’ll be using.
3. Secure the magnifying glass or camera lens inside the hole using clear tape, ensuring it’s positioned properly.
4. From the cardboard lid you previously cut out, create a small rectangular piece that fits snugly inside the box.
5. Fold this piece into an ‘M’ shape, creating a sturdy base for your phone.
6. Place the folded base inside the cardboard box, and position your smartphone on top of it with the display facing the lens directly.
7. Close any curtains or blinds in the room to darken it, and point the projector towards a blank wall.
8. Play a video on your phone and adjust the distance between the phone and the lens until you achieve a sharp, projected image on the wall, resembling a movie screen projector.
With these simple steps, you can create your own smartphone projector for an entertaining and educational project!
A Book Stand that Holds Your Book Open for You
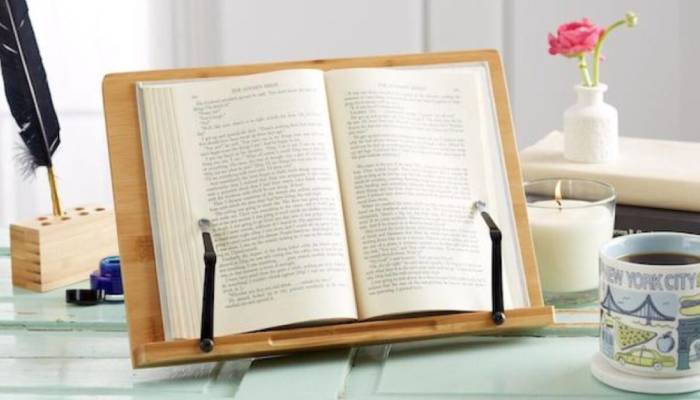
Here’s a simple DIY guide to create your own book stand that holds your book open for you:
You’ll need:
– Sturdy cardboard or thin wood
– Ruler
– Pencil
– Pair of scissors
– Tape
Instructions:
1. Begin by measuring and marking out a rectangle on your cardboard or wood. Make sure it’s slightly larger than the size of your book.
2. Use your scissors to cut out the rectangle along the markings.
3. Next, cut a slit in the middle of the rectangle. The slit should be just wide enough to fit the spine of your book. Ensure that the slit is centered in the rectangle.
4. Fold the two sides of the rectangle up at a slight angle to create a stand for your book.
5. Use tape to secure the sides in place, ensuring they maintain the angled position.
6. Finally, place your book on the stand, with the spine resting comfortably in the slit.
With this homemade book stand, you can enjoy reading hands-free!
Creative Marble Run
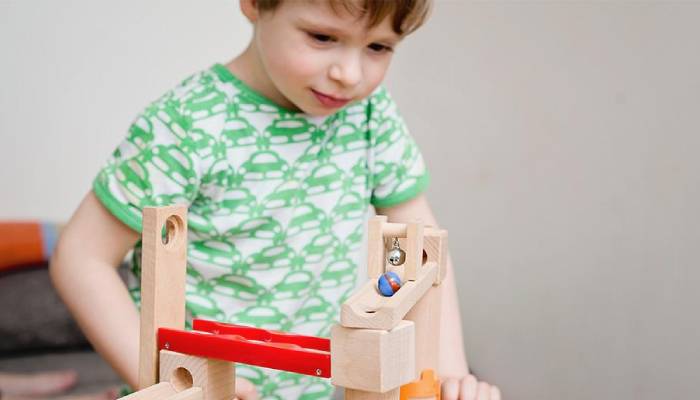
Here’s a fun DIY project to create your own marble run using items you likely already have at home:
You’ll need:
– Marbles
– Masking tape
– Cardboard tubes (like paper towel rolls or toilet paper rolls)
– Newspaper, magazines, or thick paper
– Plastic bottles
– Tape
– Scissors
Instructions:
1. Start by marking two X’s on the floor with masking tape in the room where you’ll be working. One X will be the start point of your marble run, and the other will be the finish line.
2. Encourage the kids to invent a way for the marbles to travel from the start to the finish using the materials provided. Make sure the start point is higher than the finish point and within reach.
3. Provide guidance to younger kids as needed. Help them by cutting the tops and bottoms off plastic bottles to create pathways for the marbles. Show them how marbles can roll through cardboard tubes, and demonstrate how to create runs using folded newspaper or magazine pages secured with masking tape.
4. Let the kids take the lead in deciding where to place each piece of the marble run. Encourage them to experiment and get creative with the layout.
Tips:
– Once the basic marble run is set up, challenge the kids by adding additional obstacles or requirements. For example, try creating runs with no cardboard tubes or using a certain number of plastic bottles.
– For older kids, let them come up with their own marble run designs without providing specific materials. See what inventive solutions they can come up with on their own!
With a little creativity and some household items, you can have hours of fun building and testing your own homemade marble run!
Cloud in a Jar

Here’s a simple yet captivating experiment that demonstrates the water cycle and cloud formation using everyday household items:
You’ll need:
– Clear, wide-mouth jar
– Hot water
– Cold water
– Ice cubes
Instructions:
1. Begin by filling the jar about one-third full with hot water. Make sure the water is hot enough to produce steam.
2. Quickly seal the jar with a lid to trap the steam inside.
3. Place the sealed jar in a freezer for 15-20 minutes to cool the air inside.
4. After the cooling period, carefully remove the jar from the freezer.
5. Observe the inner walls of the jar. You’ll notice condensation forming on the glass, resembling clouds.
This experiment visually illustrates the process of condensation, which is a crucial part of the water cycle and cloud formation. It’s a fantastic way to engage students in learning about meteorology and atmospheric science!
Water Filter Bottle
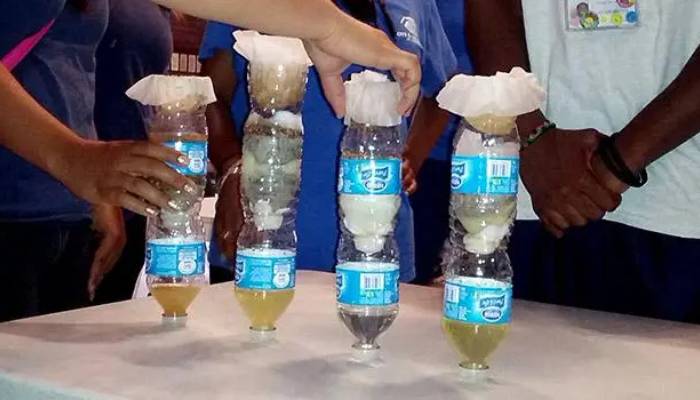
Here’s a hands-on engineering challenge for students: creating a water filter using simple materials.
You’ll need:
– Two 0.5-liter water bottles
– Cheesecloth
– Filter media (cotton balls, coffee filters, activated carbon, etc.)
– Simulated wastewater mixture (distilled vinegar, food coloring, dust, soil, hair, water)
– pH test strips
– Homemade conductivity tester
Instructions:
1. Begin by cutting the bottom off one of the water bottles to create the filter chamber.
2. Secure cheesecloth around the neck of the other bottle.
3. Fill the top bottle with various filter media, layering them to create effective filtration. Options include cotton balls, coffee filters, and activated carbon.
4. Pour the simulated wastewater mixture into the top bottle and observe the filtration process.
5. Measure the pH and conductivity of the water before and after filtration using pH test strips and a homemade conductivity tester.
The goal is to produce the clearest and purest water possible. The winning team is determined by the transparency of their filtered water.
This activity engages students in practical engineering principles while demonstrating the importance of water filtration in maintaining clean and safe drinking water.
Mini Water Cycle Model
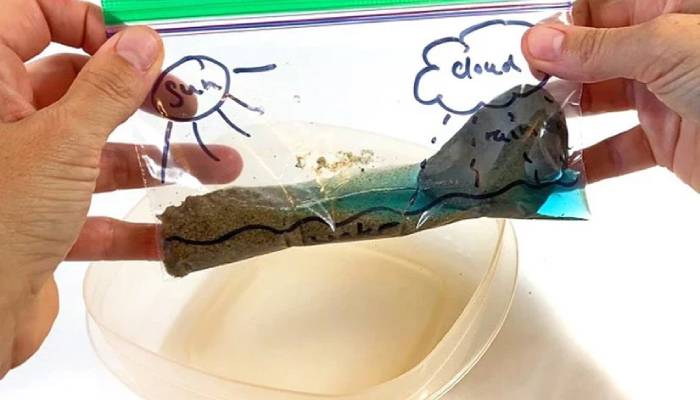
Here’s how to create a mini water cycle model using simple materials:
You’ll need:
– Clear plastic container (such as a large bottle or jar) with a lid
– Soil or sand
– Water
– Sponge or cotton wick
Instructions:
1. Begin by assembling the clear plastic container with the lid.
2. Fill the bottom of the container with a layer of soil or sand to represent the ground.
3. Add a small amount of water to the soil to simulate groundwater.
4. Attach a sponge or cotton wick to the side of the container, with one end submerged in the water at the bottom and the other end extending to the top of the container. This setup mimics the evaporation process.
5. Place the container in a sunny spot or under a lamp to encourage evaporation.
6. As water evaporates from the soil, it will condense on the cooler lid, forming droplets that represent clouds.
7. These droplets will then drip down the wick, simulating precipitation, and return to the soil, completing the cycle.
This simple model visually demonstrates the key stages of the water cycle: evaporation, condensation, and precipitation, making it a great educational tool for understanding this natural process.
A Straw Rocket
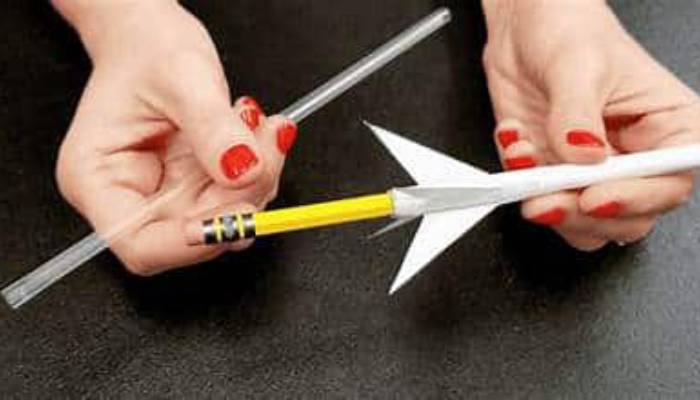
Get ready for some high-flying fun with this DIY activity: making your own straw rockets! All you need are a few simple materials to create mini rockets that you can launch into the air for hours of entertainment. Here’s how to do it:
Materials:
– Drinking straws
– Paper
– Scissors
– Tape
– Markers (optional)
Instructions:
1. Begin by cutting a small triangle from a piece of paper. This will serve as the nose cone for your rocket.
2. Next, tightly roll up another piece of paper around the drinking straw to create the body of your rocket.
3. Use tape to secure the nose cone to the top of the rocket body.
4. If you’d like, decorate your rocket with markers to give it some extra flair.
5. Now, it’s time to launch! Place the drinking straw in your mouth and blow hard to send your rocket soaring into the air.
With just a few simple steps, you can create your own fleet of straw rockets and have a blast launching them into the sky. It’s a fun and exciting activity for both kids and adults alike!
Conclusion
These top 10 invention ideas for school projects offer a diverse range of engaging and educational activities for students of all ages. From hands-on experiments like straw rockets and water filter bottles to creative models such as mini water cycle models and cloud in a jar demonstrations, these projects inspire curiosity and foster a deeper understanding of scientific principles.
Whether it’s building a balloon-powered car or constructing a smartphone projector, each project encourages critical thinking, problem-solving, and creativity. They provide opportunities for students to explore concepts in engineering, meteorology, physics, and more, all while having fun and learning through hands-on experimentation.
With easily accessible materials and step-by-step instructions, these invention ideas empower students to take ownership of their learning and explore the world around them in innovative ways. So roll up your sleeves, gather your materials, and embark on an exciting journey of discovery with these captivating school project ideas!